You can now listen to the blog post! Or scroll to the bottom to watch a video tutorial.
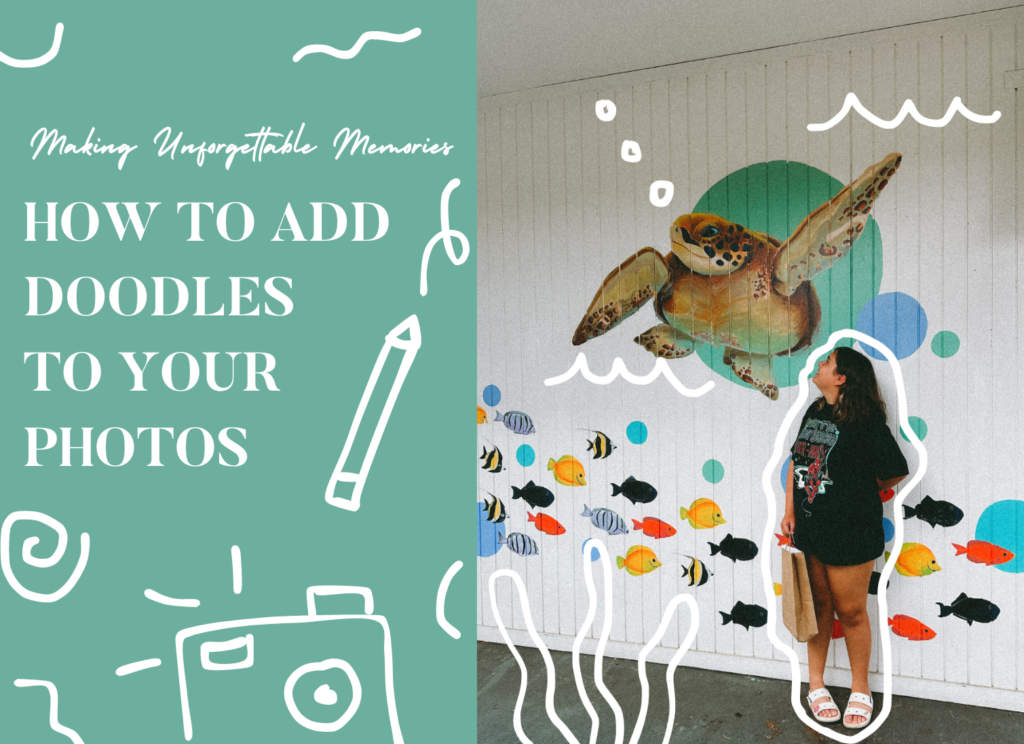
How do you add doodles to your photos?
This is the number one question I get in my DM’s from both friends and strangers alike. And here’s the thing, it’s a lot easier than you might think.
I’m going to show you 2 awesome and simple ways to add some magic to your photos with doodles.
But before I do, let me answer a few questions I get as to why I add doodles in the first place.
Aren’t you scared you’re going to mess up your pictures?
Nope. I only add things that I love and that I think would go well with the picture. They’re my pictures, and sometimes I want to add little mementos that help me remember those moments better. Sometimes it’s doodles or words – I only add what feels right.
Besides, you don’t have to alter the original photo – that’s why you can make duplicates, duplicating becomes your best friend in one of these doodling scenarios. (we’ll get to that later)
It seems like so much work, so why do you do it?
I love doodling. It’s one of my favorite pastimes. Doodling on photos only takes me maybe less than a minute per photo, depending on what I’m adding. This is a fun process for me, and that’s my hope – that you find it fun too.
Ok, let’s hop into the ways you can add some doodle magic to your photos:
Canva Doodles (Desktop Version)
- Step one, visit Canva.com – either login to an existing account or create a free account. (on your desktop or laptop)

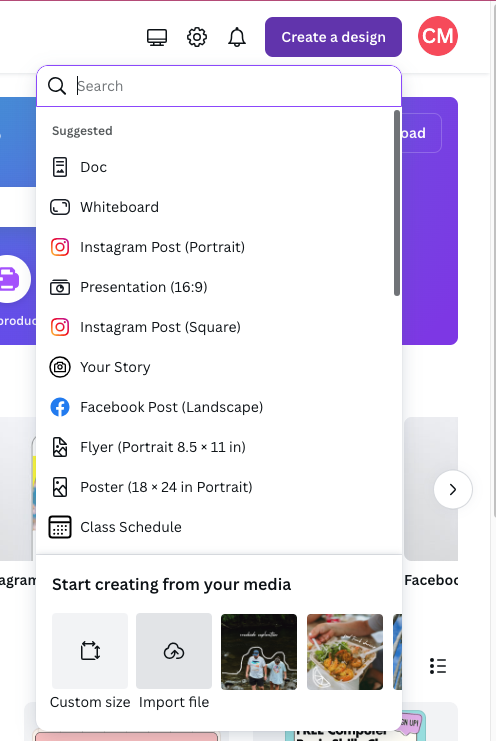
2. Once logged in, you will click on Create a design located at the top right corner of the page.

3. It will open up a drop-down options tab – scroll to the bottom and look for Import file – when you click Import file, it will prompt you to choose a photo from your computer, find your image, and click open.
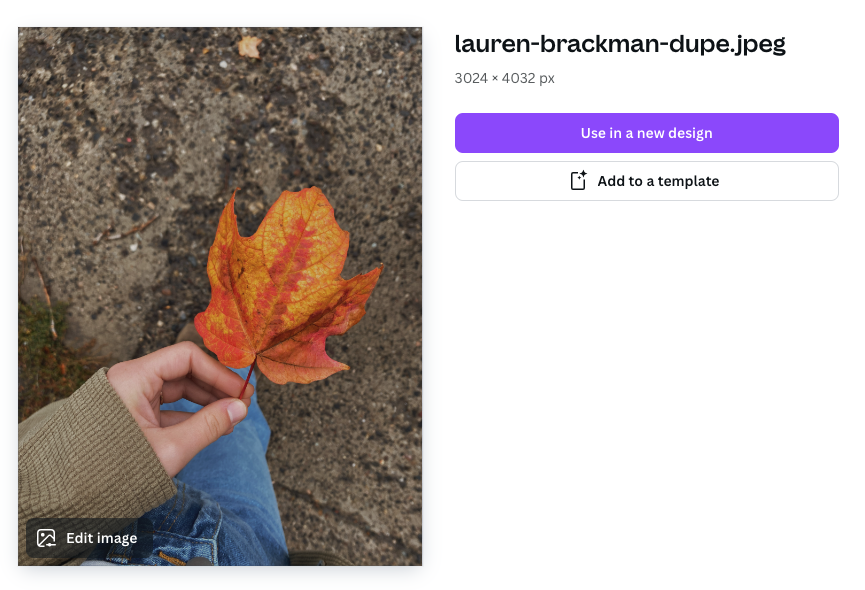
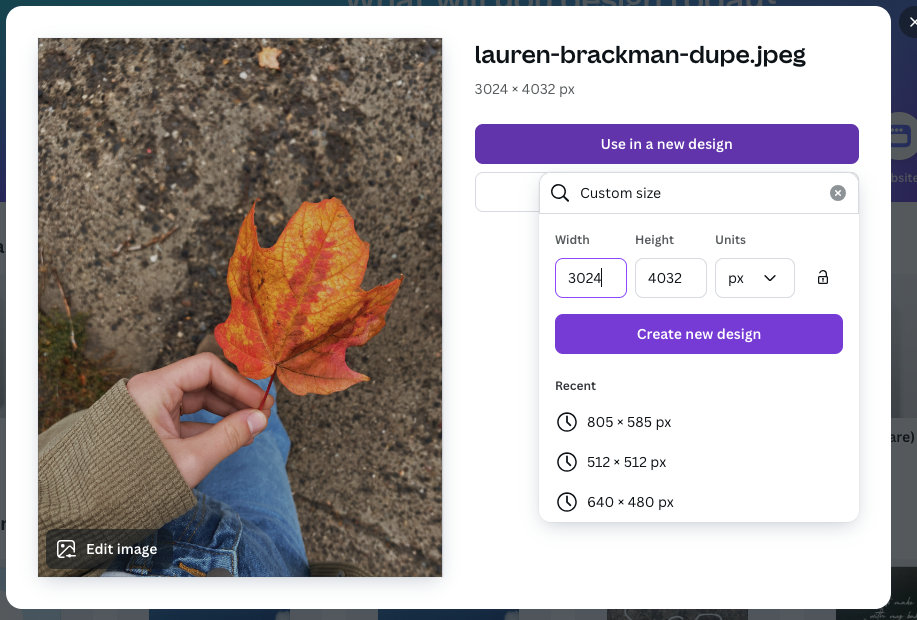
4. A screen will pop up with the option Use in a new design. Click on that button.
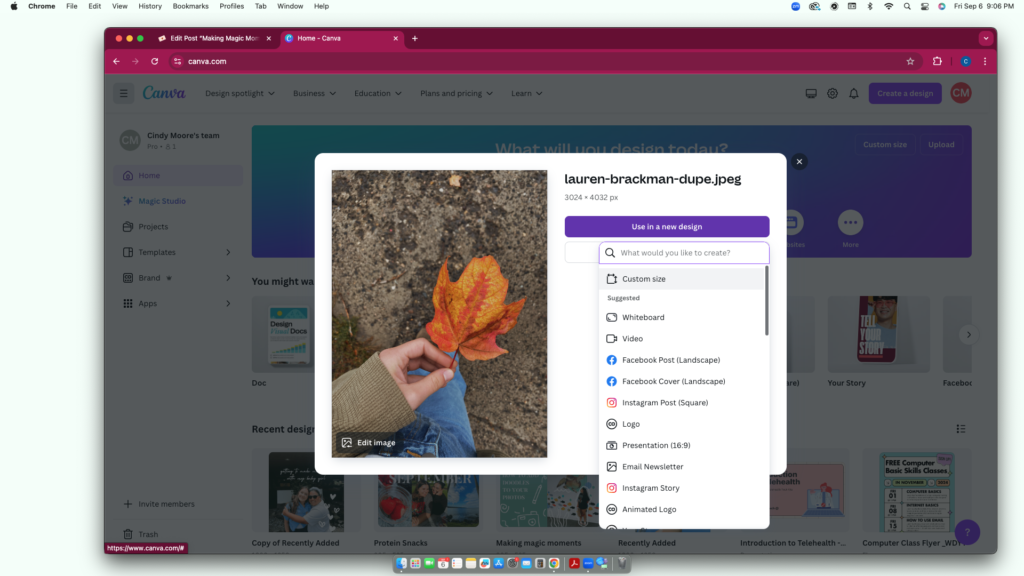
5. It will open up a dropdown for options on template sizes – FOR NOW, we are going to choose Custom size, which will open the picture up exactly as the size it is. But maybe you want to post this specific picture on Instagram and so you want Canva to size it for you before you add the doodles – this is where you could choose this option.
6. It will open up another drop-down menu with dimensions (width x Height) – ignore all that – you simply want to click on the purple button called Create new design.
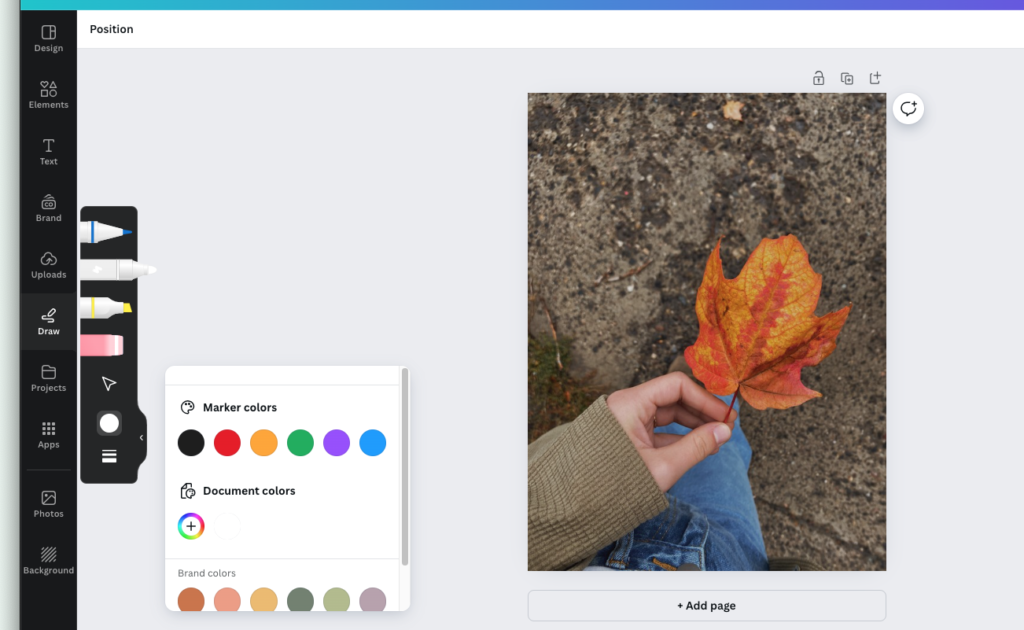
7. This will open up your photo into the editing and design screen – your photo will be on the right and the tools will be on your left. In this screen, we are looking for the option called Draw which will be located on the left-hand side in your tools area. When you click it – it will open up your doodle tools.
You will have 3 different drawing tools, an eraser, a transform button that helps you resize your doodles, a color picker, and depending on your drawing tool a thickness option.
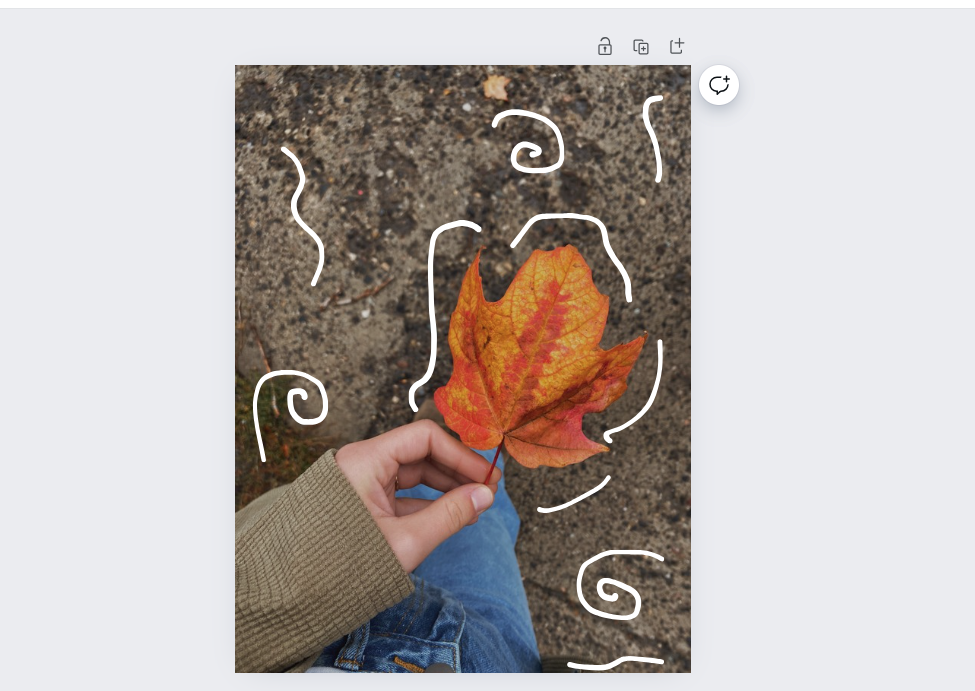
8. This is where you get to have fun, play around, and use the tools to doodle.
9. When you are ready to save and download the image, click on the word Share – which will open up a drop-down options tab – look for the word and click on Download.
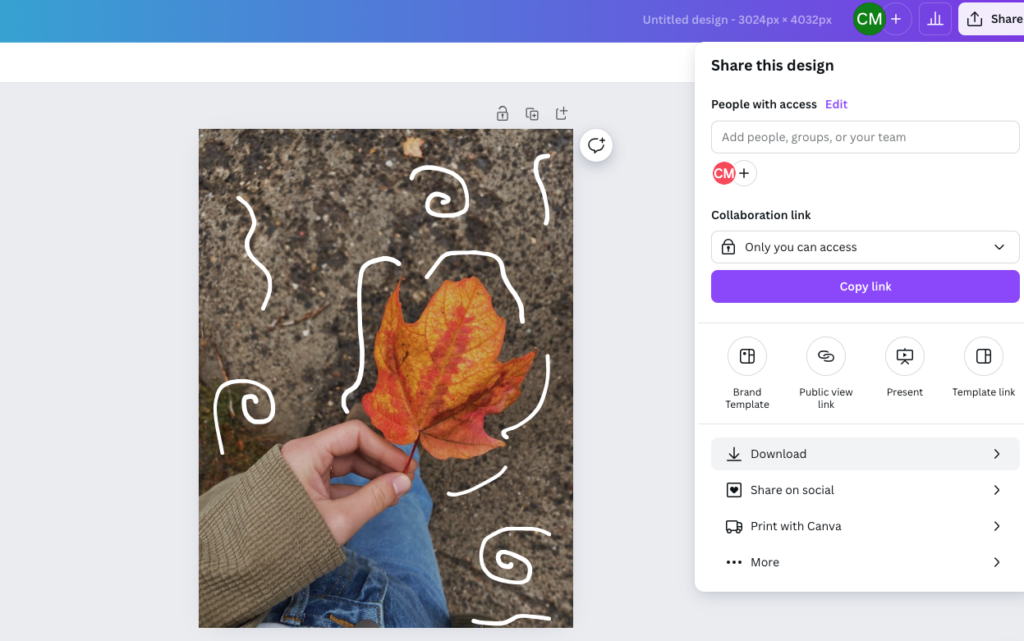
10. This will open up an options tab that gives you the ability to choose the file type you want to save your image as. I usually pick PNG – then all you have to do is click download, and voila, your image is saved in your desktop’s download folder.
*(if you are downloading multiple photos, it will download them all into a zip folder – you can locate it in your downloads and then you can extract them all, and then share them however you like)
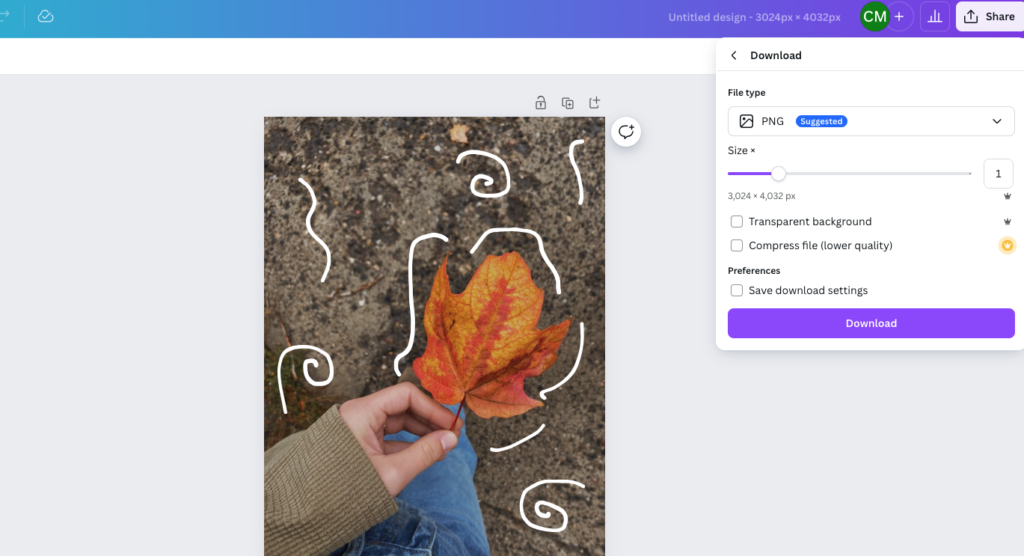
11. Once it’s saved, you can share it however you like, or send it off to get printed.
You might be thinking – but what if I want to do it to multiple photos?
That’s a great question! In your Canva editor, underneath the amazing photo you just doodled, there is the option to add a page.
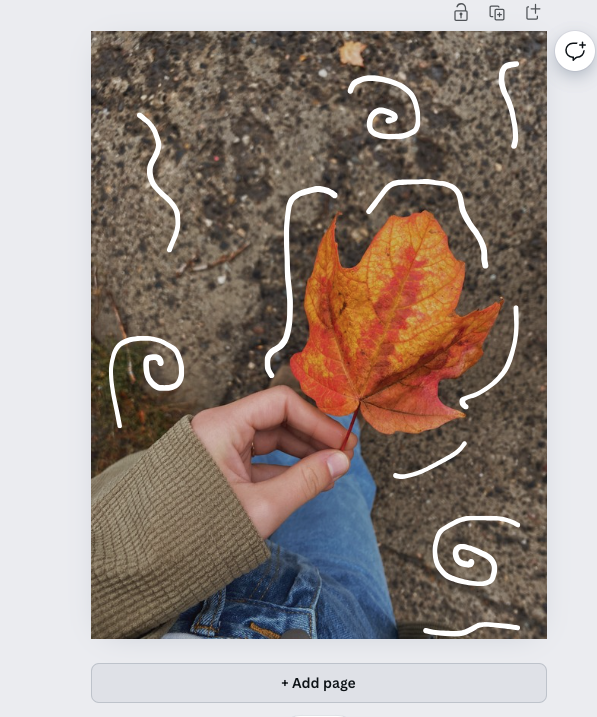
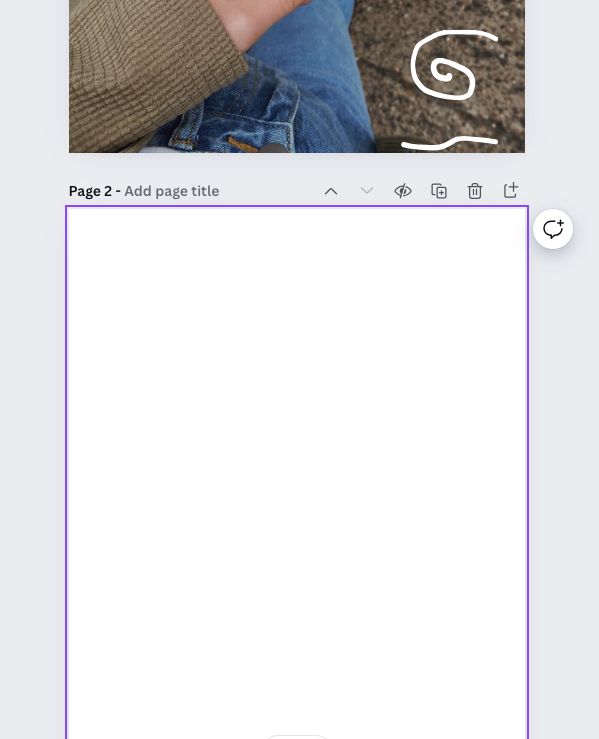
When you click on that, another blank page will pop up in the same size as your original photo.
From there you can click over the left-hand side where your tools are, and you can click on Uploads, from there you can click on the purple button that says upload files, and then proceed to upload as many photos as you would like.
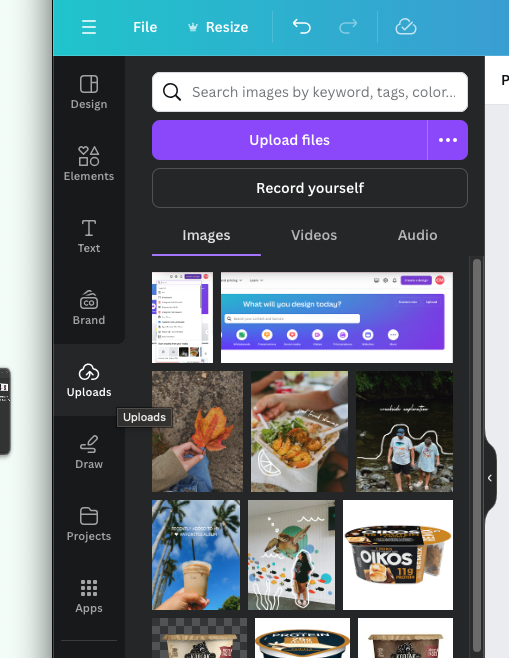
And then finally, when your photos have been uploaded to the left-hand side – you can click on a photo to add to your blank page, you might have to crop it or expand the photo to fit (depending on the size).
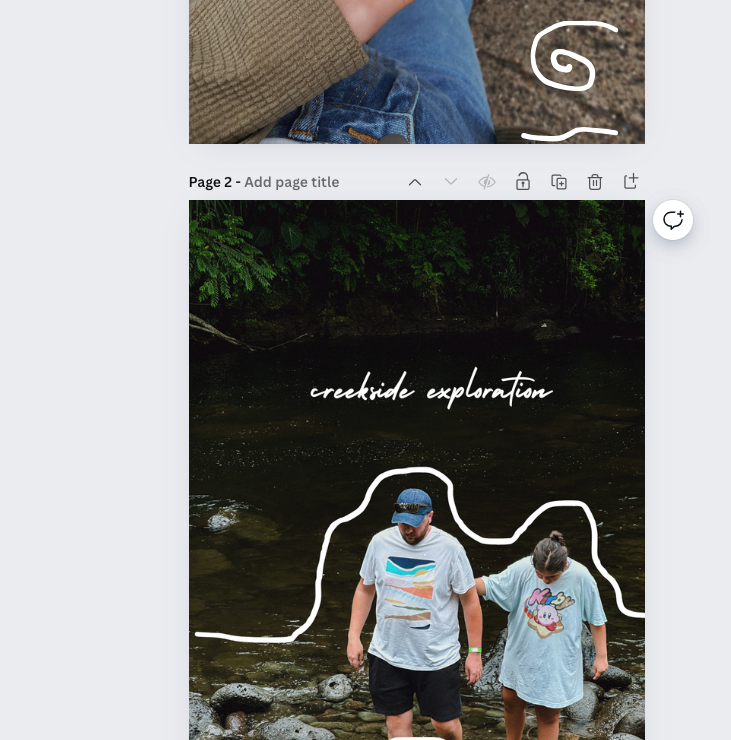
Add your doodle, text, or graphics (all tools located on the left of your editing screen) then repeat with Add Page, and continue to add your photos. When you’re all done, you can go back to STEP 9 above to download and save.
Canva Doodles (iPhone App Version)
1. Open the Canva app – log in or create a free account. Once logged in, click on the little purple plus icon at the bottom of the app.
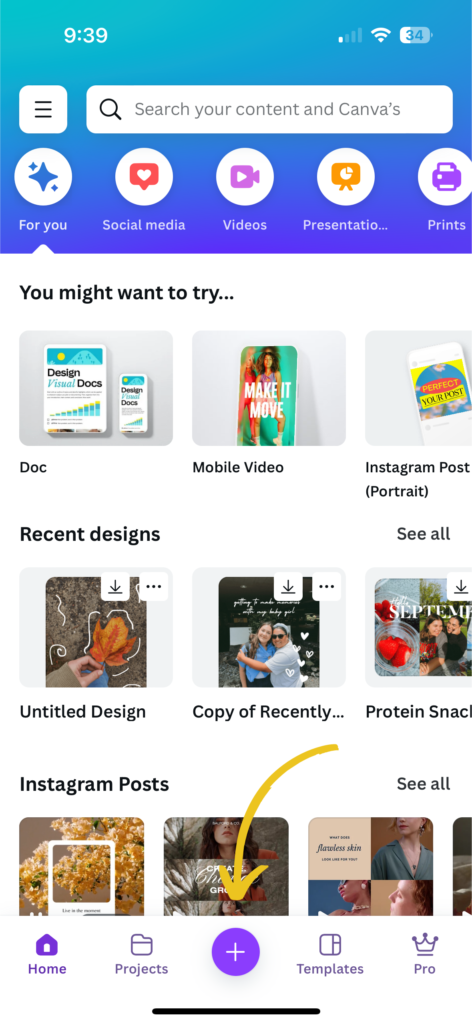
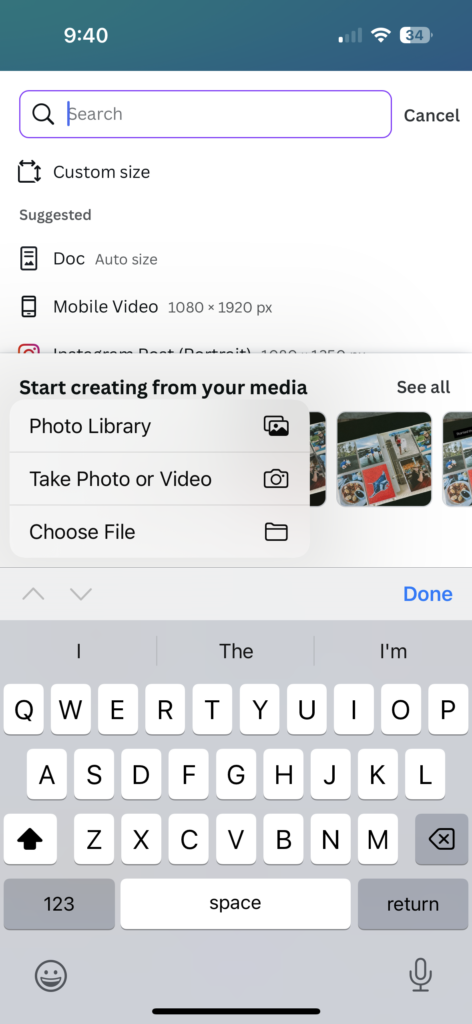
2. It will open a drop-down menu, scroll to the bottom and click on the little upload cloud icon located underneath the words Start Creating From Your Media.
3. Once clicked, it will give you the option to choose a photo from your phone – I usually choose from my photo library. Find your photo and upload it (usually you click on done).
4. A screen with your photo will pop up, and you will want to click on Use in a new design

5. This will load up your editing screen, your tool bar will be located at the bottom. Scroll until you find your draw tool. From there, you can begin to add your doodles.
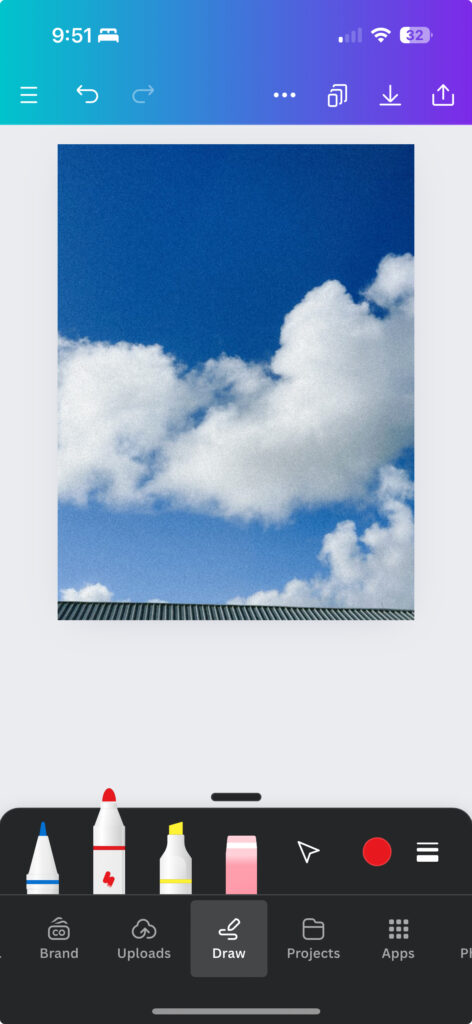
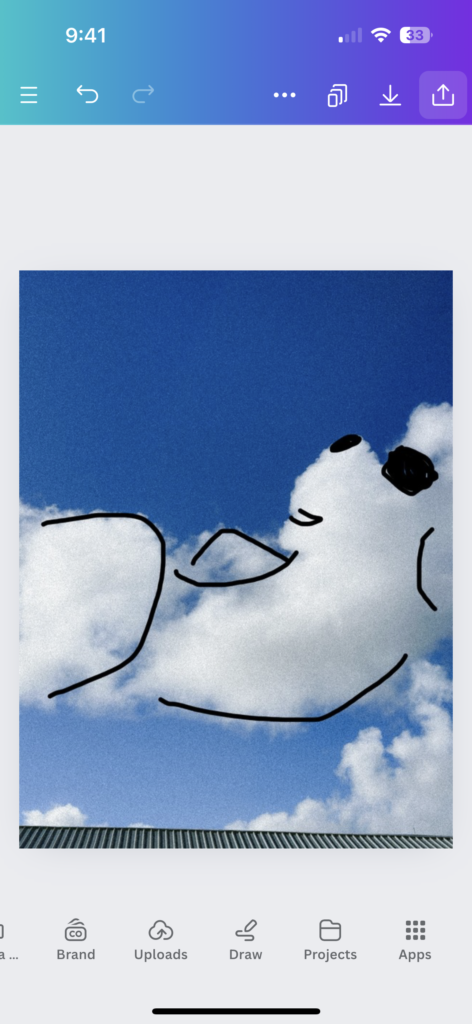
6. When you’re done, and you’re ready to save your photo onto your phone, you will click the arrow pointing up, located on the top right-hand side of the app.
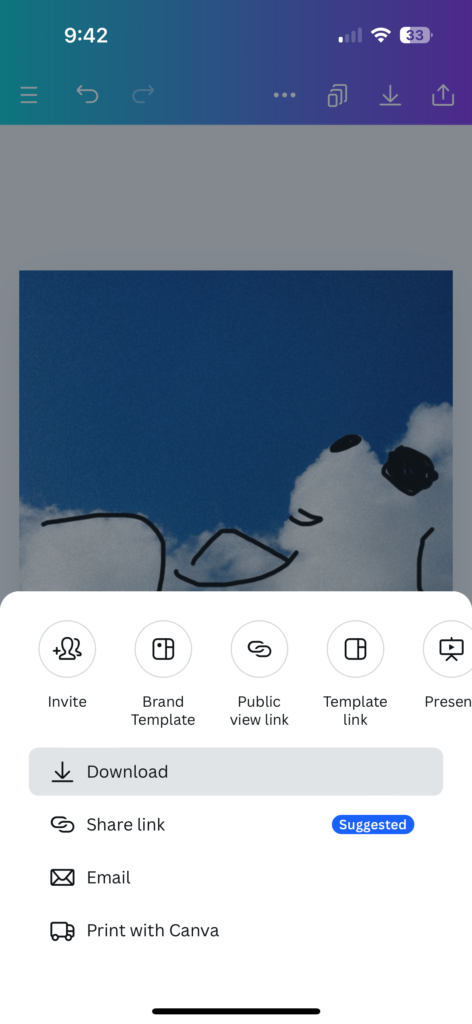
7. It will open a drop-down menu with options – you will look and click on the word Download.
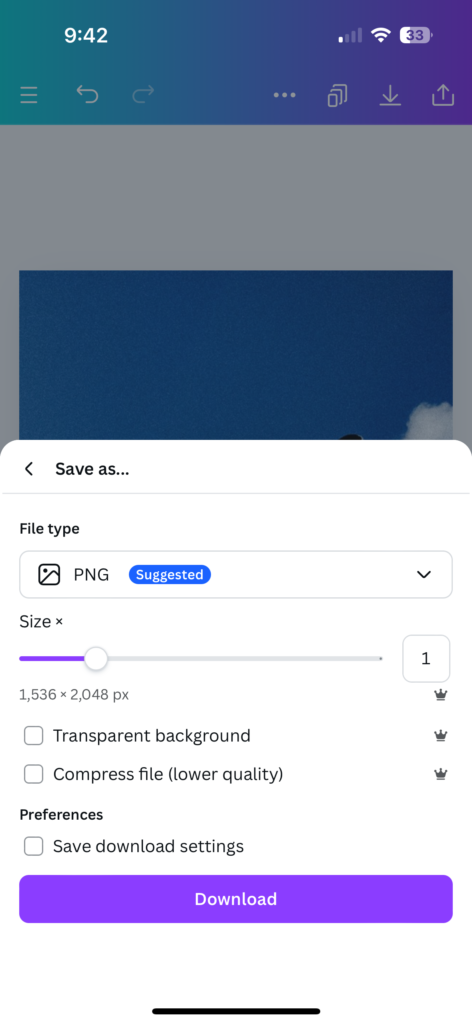
8. Finally, you will see options for your file type. I keep it as a PNG and then I hit download.
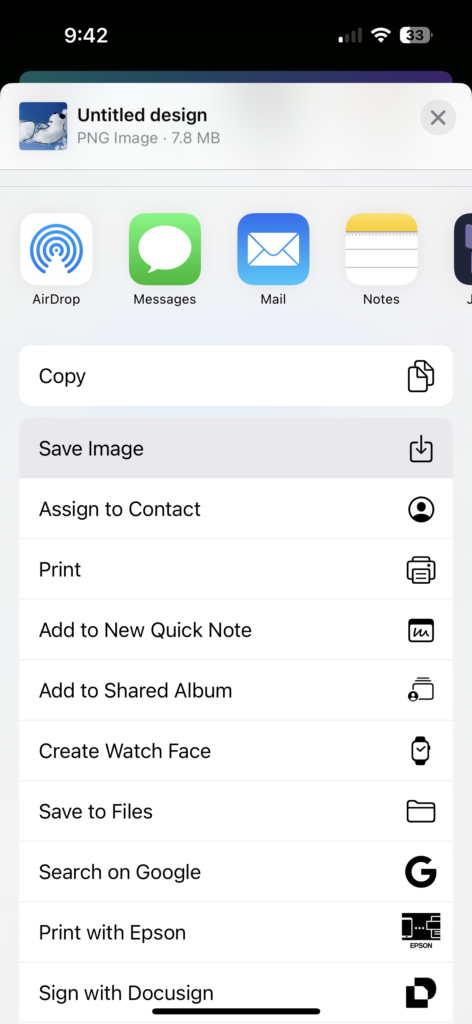
9. It will give you a variety of options of what to do with the photo and I always click on SAVE IMAGE – it gets added to my photos and I’m a happy girl.
Guess what? The hard part is over, now let me teach you the easiest way to doodle using your iPhone.
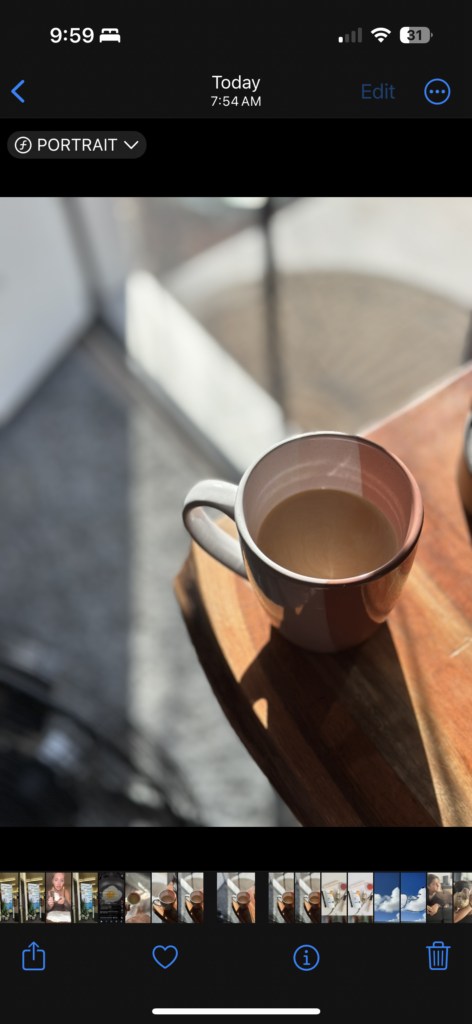
- Find your photo in your album – click on edit located in the top right-hand corner
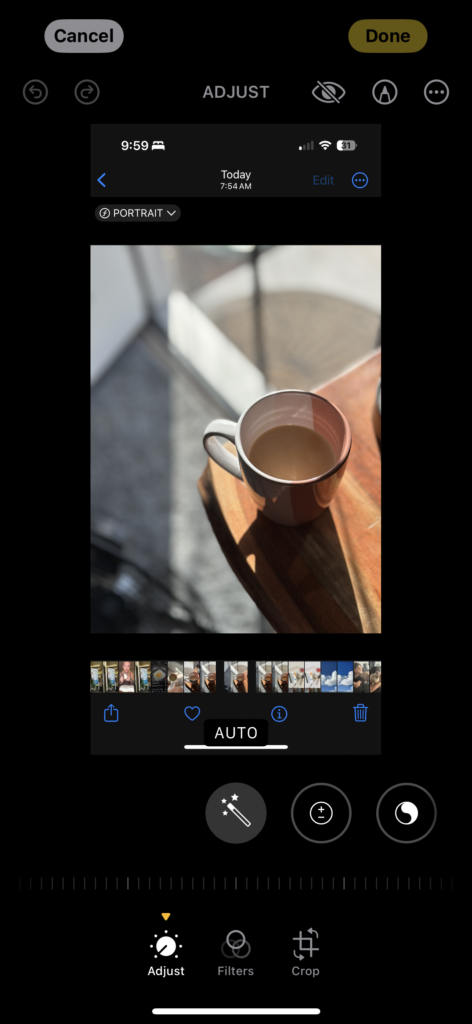
2. Then click on the pen icon located in the top right-hand corner – it’s called Markup
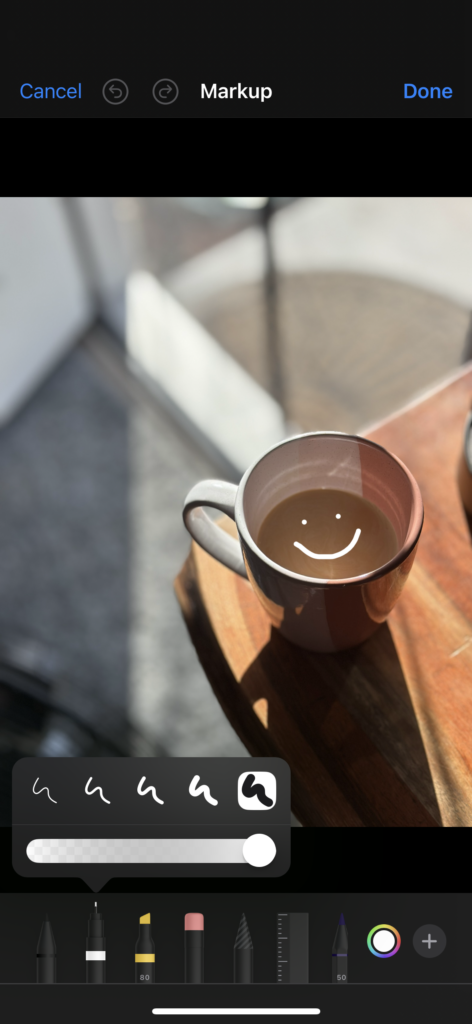
3. It opens up a little doodle toolbox on the bottom, where you can begin to doodle. When you’re done, all you have to do is click Done. And it then saves it for you, just like that. (If you want to keep a copy of the original, I always RECOMMEND you duplicate the photo first, before making any doodles or edits to it)
Other options
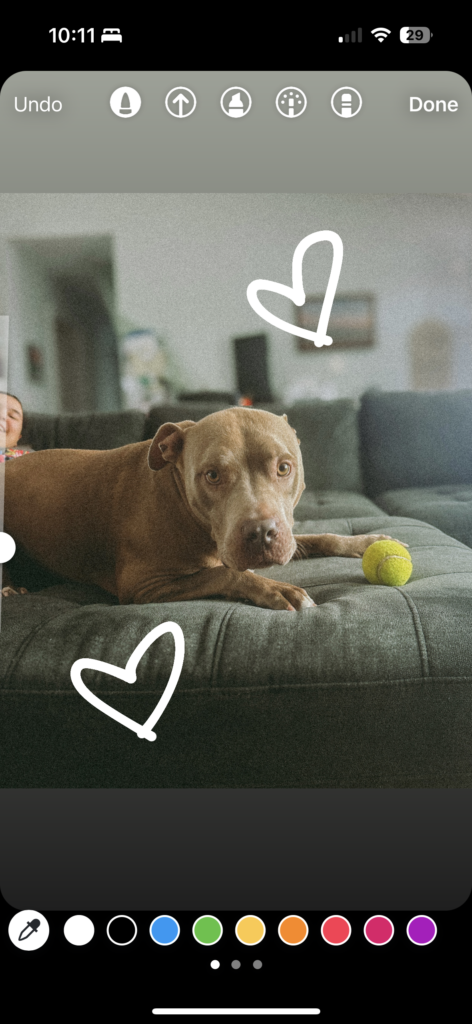
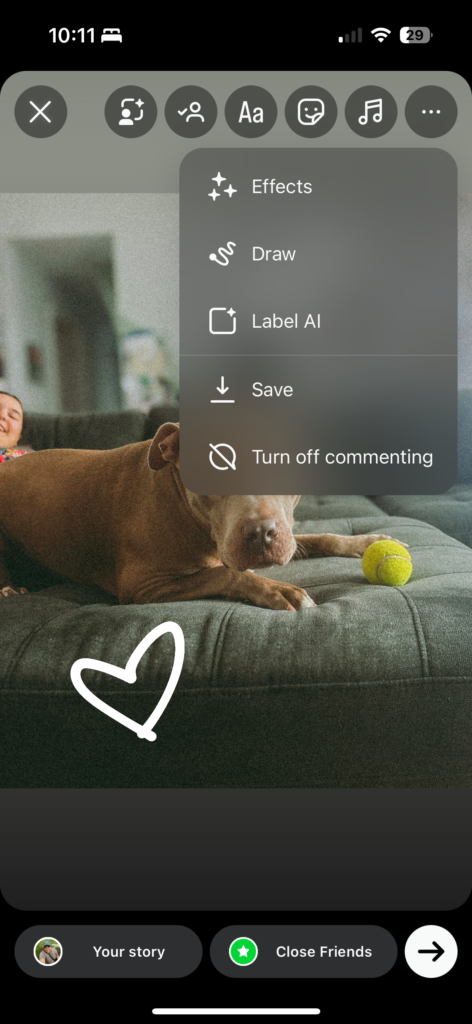
Another perfect option is to edit directly in Instagram stories. They have lots of great tools that you can use to add magic to your photos. Then when you’re done, you can share, or save it directly onto your phone.
I hope you found this helpful!
I can’t wait to see all your magical doodles. Please make sure to tag me on Instagram and show me all the fun doodles you make! Until next time…
With Love,
Cindy